I built this back in '96 (when I was still WA6AHL). I was inspired by a couple of ideas -- the first was a description of the "Pixie 2" transceiver which appeared in the December, 1993 issue "QRPp" (the Journal of the Northern California QRP Club). The Pixie 2 had been built into a 35 mm film canister, which I thought was a pretty cool idea. Then there was some chatter on the QRPp list about a new design by Wayne Burdick, the "Forty-Niner" (a forty-meter, 9 volt transceiver). He hadn't yet published the schematic, but there was a parts list available, and I started thinking...a 9 volt battery shell would be the ideal housing for a 9V transceiver -- the battery connector is built-in!
So, inspired by the idea of Wayne's "Forty-Niner" and using his parts list as a starting point, I undertook my own design, which, through the judicious use of whatever surface-mount components I could find, allowed me to cram everything within the 9V battery case.
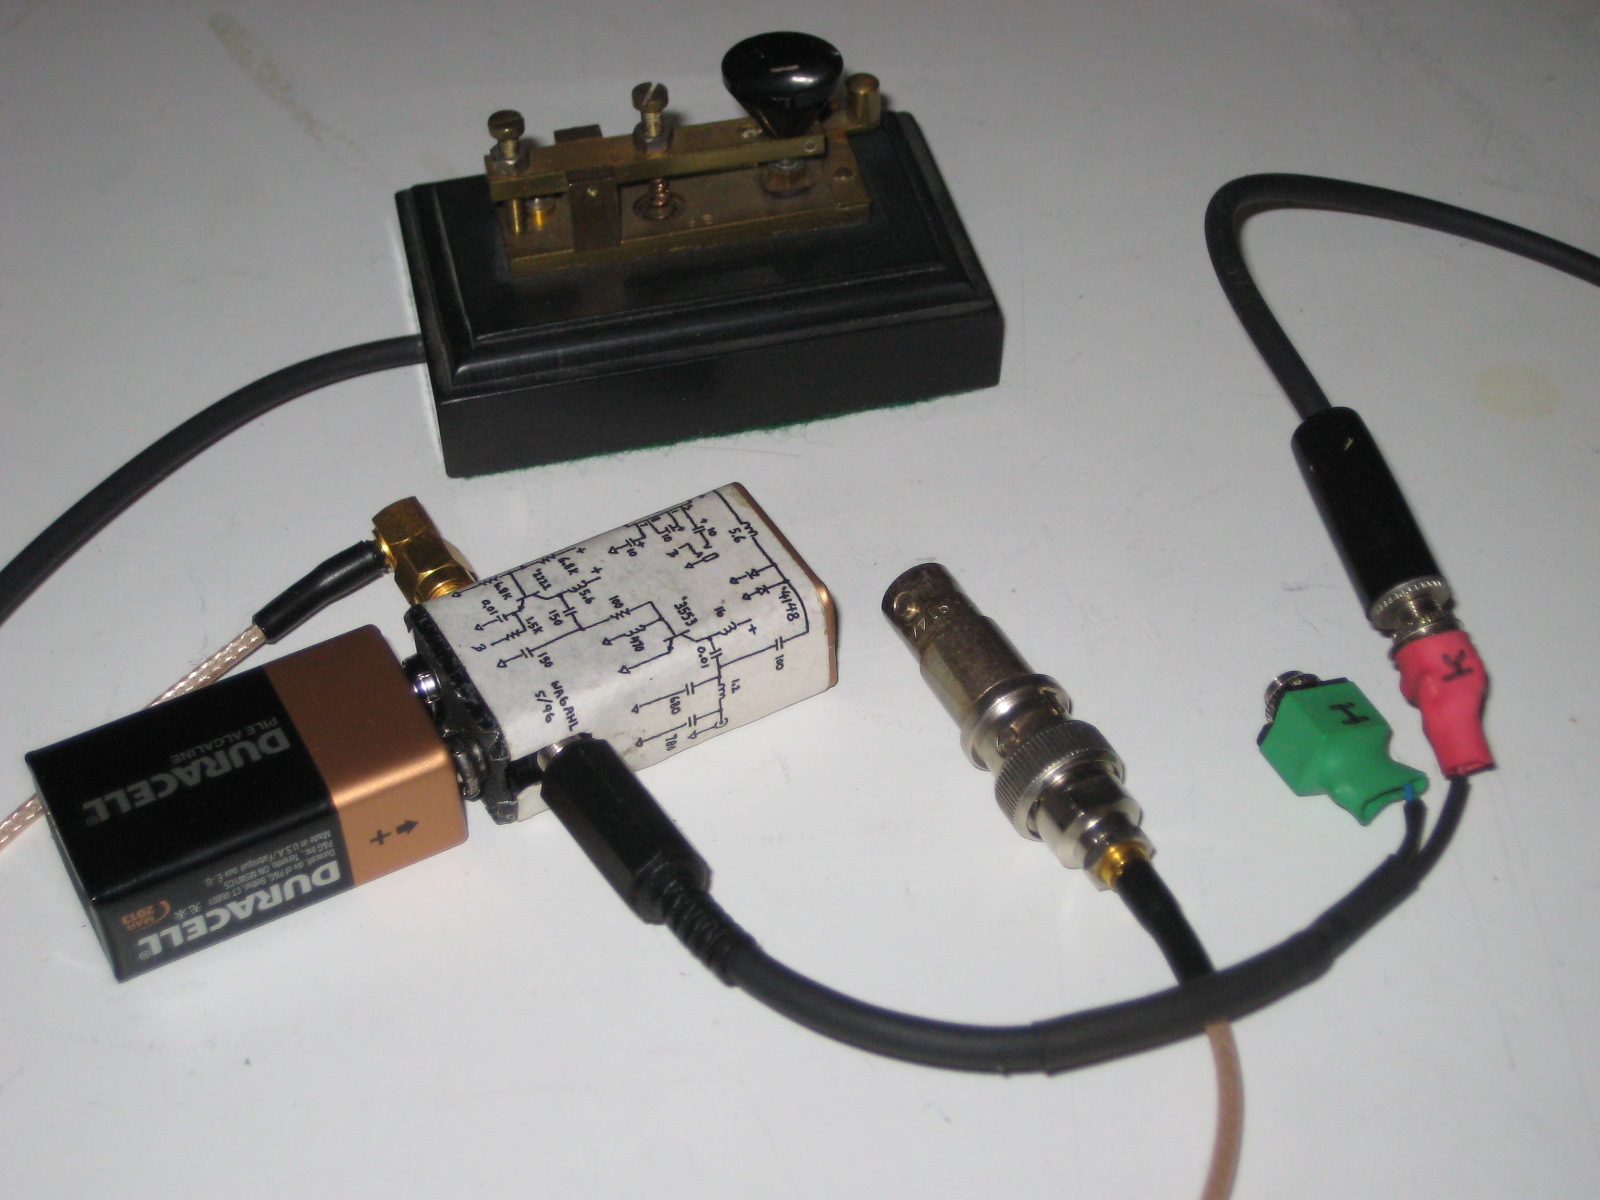
An SMA connector serves as the antenna jack, and I bring both key and headphones into the radio via a single 1/8" stereo phone jack (Tip = headphones, Ring = key). An adapter cable breaks out these two signals into two seperate jacks.
(Click on any image to enlarge.)

"Input Attenuation" and "VXO frequency control" are handled via two pots on the opposite side of the battery from the battery connector. Screwdriver controlled!

The complete setup, minus only an actual antenna and the headphones (which plug into the "green" connector).
Here's the schematic. Click on the image to enlarge...

(Note, in hindsight, I didn't need to add C15 (which I installed as a DC block) -- the xtal will also block DC.)
I've had it on the air a few times -- with a 9V battery the power out is about 300 milliwatts (900 mW with a 12V battery), and I've made contacts in California and Oregon. It's a bit too small to operate the controls comfortable (given that they're screwdriver adjustment), never the less, it was a fun little project to design and build. An article describing this design in greater detail appeared in the September, 1996 issue of QRPp. It's titled, "The Everyready: a 9V Direct Conversion Tranceiver."


13 comments:
Hi ON4LDU Alain here, i'm vy interested to buy one completely made and working.
Best 73s de Al
lamenace6@msn.com
My apologies, Alain, but this is the only one that I've built and unfortunately it is not for sale.
Best Regards!
- Jeff, k6jca
How much was you able to shift the freq. 73,
jim WA5PQN
I no longer recall what the pull range was. Not much, I'm sure. Probably on the order of +/- 5 KHz or so.
- Jeff
How do you get the stuff out of the battery so you can use the casing? Better yet, how do you get the stuff out without getting it all over you and ruining your clothes, and possibly getting acid burns? I already have purchased two 9V batteries for this specific purpose.
Thanks and 73,
David P. KJ4IOR
Hi David,
It's actually straightforward. I "unbent" the metal casing around the top of the battery with a pair of needle-nose pliers, then pushed the bottom of the battery. The innards slid out the top as I pushed the bottom into and through the case.
If I recall correctly (it's been years since I did this), there was no mess. Never the less, take precautions and use common sense.
- Jeff
I forgot to mention...I reused the top of the battery (with the connectors) to be the radio's power connector.
- Jeff
Thanks for the info. Was there any residue that you had to deal with after you pushed the innards out? If so, what did you use to clean out the casing?
David P.
KJ4IOR
Hi David,
I don't recall there being any residue that needed cleaning. In fact, if I recall correctly it was surprisingly UNmessy. But it has been awhile, so I might be misremembering.
If you do attempt a battery disassembly, please report back with your results !
- Jeff
Will do. How hard was it to cram all that stuff into the battery case (I read the article you wrote that was in the July '97 QRP Quarterly, and you said "never again!")? I may build two, one in the battery and another in a small project box.
David P.
KJ4IOR
It took some thought and planning. Many of the parts are surface-mount (if I'm recalling correctly), and they often connect nicely across side-by-side pads on the pre-drilled board I used.
My hat is off to you. That is impressive.
Don VE3LYX
bravo ! c est impressionnant de patience 73 F5SKJ
Post a Comment